
 rosendo
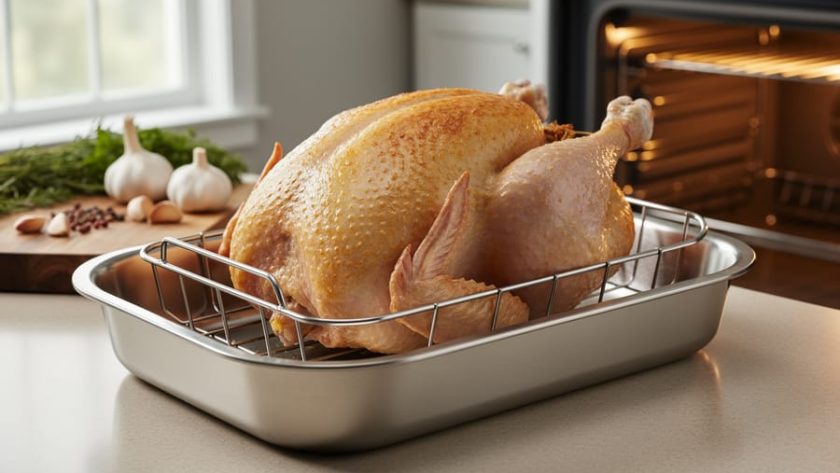
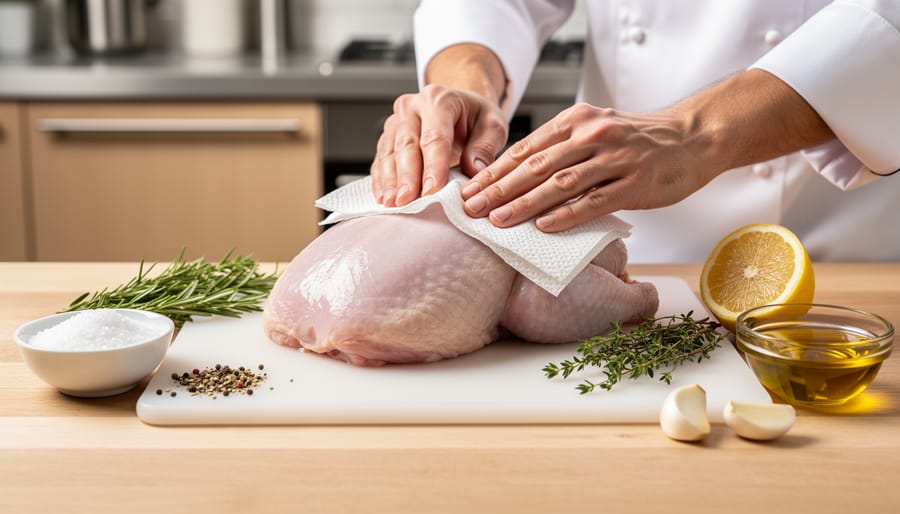
 Preheat your oven to 325°F and calculate 20 minutes of cooking time per pound for an unstuffed Butterball turkey breast, ensuring your meat thermometer reaches 165°F in the thickest part before removing from heat. Remove all packaging materials, including the netting if present, and pat the turkey breast completely dry with paper towels to achieve proper browning. Position the breast skin-side up on a roasting rack set inside a shallow pan, allowing air circulation underneath for even cooking.
Season the exterior liberally with salt at least one hour before cooking, or preferably the night before, following the French technique of pre-salting to enhance moisture retention and flavor penetration. This method, known in classical French kitchens as salage à sec, transforms the texture of poultry by allowing the salt to draw out moisture that then gets reabsorbed along with the seasoning.
The key difference between institutional cooking and French technique lies in temperature management. Many home cooks make the mistake of cooking turkey breast at temperatures exceeding 350°F, which creates a dramatic temperature gradient between the exterior and interior. The slower, gentler heat of 325°F produces remarkably tender, juicy meat with minimal moisture loss. Professional chefs understand that patience in roasting yields superior results.
Basting proves largely unnecessary when you employ proper setup from the start. Instead, brush the skin with clarified butter or neutral oil before roasting to promote golden browning. If you notice excessive browning during cooking, tent the breast loosely with aluminum foil. Let the cooked turkey rest for 15 to 20 minutes before carving. This resting period allows the muscle fibers to relax and redistributes the juices throughout the meat, preventing them from flooding onto your cutting board.
Understanding Your Butterball Turkey Breast: Product Overview and French Preparation Principles
Selecting the right Butterball turkey breast is your first culinary decision, and understanding what you’re working with informs every technique that follows. Butterball offers two primary categories: bone-in and boneless turkey breasts. The bone-in variety, typically ranging from 4 to 9 pounds, retains the natural structure that helps conduct heat evenly and protects the meat from drying out during cooking. French chefs prize this cut because the bone acts as a heat conductor while adding depth to any jus you create from the pan drippings.
Boneless Butterball turkey breasts, usually between 3 and 7 pounds, offer convenience for carving and faster cooking times. However, they require more vigilant attention to prevent overcooking. Think of this as the principle of respecting your ingredient, knowing its structure determines how you apply heat and moisture.
You’ll also choose between fresh and frozen options. Fresh turkey breasts eliminate thawing time but must be cooked within two days of purchase. Frozen breasts, while requiring advance planning, often provide better availability and allow you to control your preparation timeline with French precision.
| Variety | Weight Range | Cooking Time per Pound | Ideal French Technique |
|---|---|---|---|
| Bone-in, fresh | 4-9 lbs | 20-25 minutes | High-heat sear with basting |
| Bone-in, frozen | 4-9 lbs | 20-25 minutes (after thawing) | Dry brine with compound butter |
| Boneless, fresh | 3-7 lbs | 18-22 minutes | Wet brine with aromatic bed |
| Boneless, frozen | 3-7 lbs | 18-22 minutes (after thawing) | Compound butter under netting |
If you’re working with a frozen turkey breast, proper thawing is non-negotiable. The safest method requires 24 hours of refrigerator time for every 4 to 5 pounds of turkey. A 6-pound breast needs approximately 36 hours. This isn’t mere food safety protocol, it’s about achieving even temperature distribution before cooking begins. French culinary tradition emphasizes this mise en place approach: every element properly prepared before heat is applied.
Never thaw at room temperature. Rushing this stage compromises both safety and the meat’s ability to accept seasoning uniformly. The patience you invest in proper thawing pays dividends in texture and flavor development, allowing your French techniques to work as intended rather than compensating for structural flaws created by hasty preparation.
Essential French Techniques for Turkey Breast Preparation
Dry Brining vs. Wet Brining: The French Approach
French chefs have long understood that proper salting before cooking is the foundation of flavor development. For your Butterball turkey breast, you have two excellent options: dry brining and wet brining.
Dry brining is the French preference for poultry. It involves rubbing kosher salt directly onto the turkey breast skin and meat, then refrigerating uncovered. Use 1/2 teaspoon of salt per pound of turkey breast. The salt draws moisture to the surface, which then dissolves the salt and carries it back into the meat through osmosis. This process seasons deeply while simultaneously drying the skin for superior browning. For a bone-in Butterball turkey breast, apply the dry brine 24 to 48 hours before roasting. You can incorporate French cooking spices like herbes de Provence, cracked black pepper, or crushed juniper berries alongside the salt.
Wet brining submerges the turkey breast in a saltwater solution (1/2 cup kosher salt per gallon of cold water) for 12 to 24 hours. This method adds moisture through absorption but can dilute natural turkey flavor. The French typically reserve wet brining for lean cuts that risk drying out during extended cooking.
For most home cooks preparing Butterball turkey breast cooking instructions, dry brining delivers better texture and concentrated flavor. The uncovered refrigeration also promotes the Maillard reaction during roasting, creating that sought-after golden crust.
Creating a Compound Butter (Beurre Composé)
Compound butter transforms your Butterball turkey breast from simple to sublime. This French technique, known as beurre composé, delivers moisture directly to the meat while infusing it with aromatic flavors during roasting.
Start with four tablespoons of softened butter at room temperature. Mix in two tablespoons of finely minced fresh herbs, classic combinations include thyme with rosemary and sage, or parsley with tarragon and chives. Add one minced garlic clove, a pinch of fleur de sel, and freshly cracked black pepper. Work the mixture with a fork until evenly distributed.
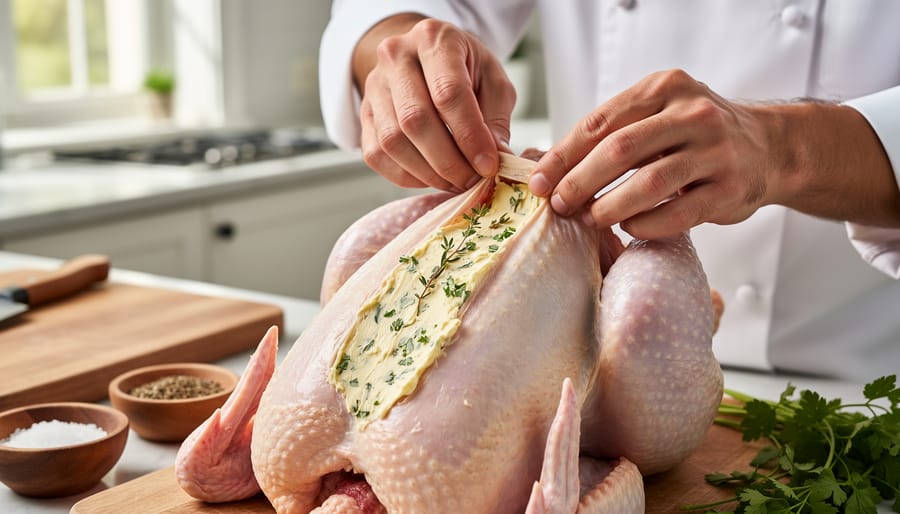
The key is placing this butter beneath the skin without tearing it. Begin at the neck end of your turkey breast, where the skin is naturally looser. Gently slide your fingers between the skin and meat, moving slowly and deliberately. Use your fingertips to create a pocket, working toward the opposite end of the breast. If you encounter resistance, ease your fingers sideways first, then forward.
Once the pocket is formed, divide your compound butter into three portions. Place them at intervals under the skin, then gently massage the exterior to spread the butter evenly across the breast surface. This technique ensures the butter melts during cooking, basting the meat from within while the skin develops a golden, herb-flecked exterior.
Refrigerate for thirty minutes before cooking to firm the butter and help it adhere.
Building Your Mirepoix Base
A classic mirepoix creates a flavorful foundation for roasting your Butterball turkey breast while preventing the meat from sticking to the pan. Dice two parts onion, one part carrot, and one part celery into roughly half-inch pieces, precision matters less here than creating an even layer. Spread the vegetables across the bottom of your roasting pan, creating a natural rack that elevates the breast slightly and allows heat to circulate underneath.
The vegetables will caramelize during roasting, releasing moisture that bastes the turkey from below and concentrating their flavors into the pan drippings. This aromatic bed serves double duty: it flavors your turkey breast while providing the foundation for your jus. Add a few sprigs of fresh thyme or a bay leaf to the mirepoix before placing the turkey on top for additional depth.
Butterball Turkey Breast Cooking Instructions: French Roasting Method
Temperature Guidelines and Timing
The USDA recommends you cook turkey to 165°F in the thickest part of the breast, measured with an instant-read thermometer inserted horizontally. In French culinary practice, precision is paramount. Remove your turkey breast from the oven when the internal temperature reaches 160°F, carryover cooking will bring it to 165°F during the resting period. This prevents overcooking and maintains the juicy texture essential to quality poultry.
| Turkey Breast Weight | Oven Temperature | Approximate Time | Target Internal Temp |
|---|---|---|---|
| 4-6 lbs (boneless) | 450°F → 350°F | 90-120 minutes | 160°F |
| 6-8 lbs (bone-in) | 450°F → 350°F | 2-2.5 hours | 160°F |
| 8-10 lbs (bone-in) | 450°F → 350°F | 2.5-3 hours | 160°F |
These timing estimates begin with a high-heat sear at 450°F for the first 15 minutes to achieve golden-brown skin, followed by a reduction to 350°F. Use these as guidelines rather than absolutes. The thermometer provides the definitive answer, not the clock.
Basting Technique: When and How
French chefs debate whether basting truly benefits roasted poultry, but when done correctly with proper timing and technique, it adds both flavor and visual appeal to your Butterball turkey breast. The key lies in strategic execution that doesn’t sabotage your oven’s heat.
Begin basting only after the first 45 minutes of roasting, once the skin has begun to develop color and structure. Opening the oven too early releases crucial heat and disrupts the browning process. Use clarified butter (beurre clarifié) rather than whole butter, its higher smoke point and absence of milk solids prevent burning and bitter flavors. Pan juices work equally well, though they contain less fat for moisture protection. If you’re exploring basting fat alternatives, consider duck fat or herb-infused oils for distinctive flavor profiles.
Baste every 30 minutes thereafter, working quickly and purposefully. Heat a metal spoon or ladle in the oven beforehand so cold utensils don’t lower the pan temperature. Tilt the roasting pan slightly to pool the juices, draw them up, and pour them smoothly over the breast in three or four swift passes. Keep the oven door open no longer than 45 seconds, every minute of exposure drops the temperature by roughly 25°F, extending cooking time and risking uneven results.
This measured approach adds a glossy finish without compromising the cooking environment your turkey needs.
Creating a Classic French Jus from Pan Drippings
Once your turkey breast is resting, the roasting pan holds liquid gold: concentrated fond (caramelized drippings) and rendered fat that form the foundation of a classic French jus. Unlike gravy, which is thickened with flour or cornstarch, a proper jus relies on reduction and emulsification for body and shine. This technique transforms the pan drippings into a refined sauce that complements rather than masks your turkey.
Begin by carefully removing the mirepoix vegetables from the roasting pan, discarding them or setting aside for stock if desired. Pour off most of the fat, leaving about two tablespoons and all the browned bits clinging to the bottom. Place the roasting pan directly over two burners on medium-high heat until it begins to sizzle. This step is essential for proper deglazing.
- Pour in one cup of dry white wine or turkey stock, immediately scraping the pan bottom with a wooden spoon to release the fond. The liquid should bubble vigorously.
- Continue scraping and stirring as the liquid reduces by half, about three to four minutes. This concentrates the flavors while the alcohol cooks off.
- Add two cups of warm turkey or chicken stock, then reduce heat to maintain a gentle bubble. Apply the jus simmering technique here, keeping the liquid at a bare simmer rather than a rolling boil to preserve clarity.
- Reduce the liquid by half again, about eight to ten minutes, until it coats the back of a spoon lightly.
- Strain the jus through a fine-mesh sieve into a clean saucepan, pressing gently on any solids to extract maximum flavor.
- Off the heat, whisk in two tablespoons of cold unsalted butter, one tablespoon at a time. This creates the characteristic glossy finish and silky mouthfeel of French jus.
Taste and adjust seasoning with sea salt and freshly cracked black pepper. The jus should taste intensely savory without being salty, with bright notes if you used wine. For those interested in wine pairings for your meal, consider using the same white wine in your jus that you plan to serve alongside the turkey breast.
Serve the jus warm in a heated sauceboat, allowing guests to add just enough to enhance each slice without drowning the delicate turkey flavor.
Resting and Carving: The French Art of Presentation
Once your Butterball turkey breast reaches 165°F internally, resist the urge to carve immediately. Transfer it to a cutting board and tent loosely with aluminum foil. This resting period, 15 to 20 minutes for a turkey breast, allows the muscle fibers to relax and reabsorb the juices that have been pushed toward the center during cooking. Skip this step and you’ll see a pool of liquid on your cutting board instead of juicy slices on your plates.
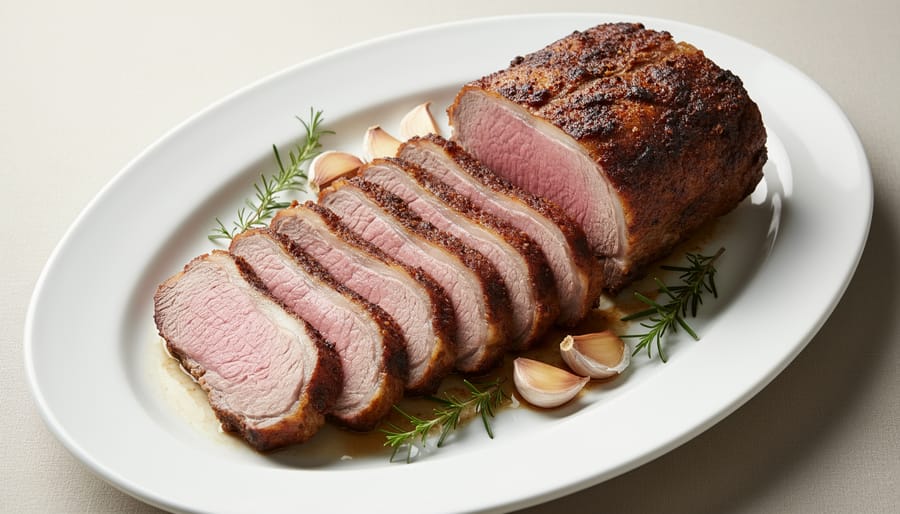
While the meat rests, prepare your carving station. You’ll need a sharp carving knife with a long, thin blade and a sturdy cutting board with a juice groove. If you’ve roasted a bone-in breast, position it with the breastbone facing up. Insert your knife parallel to the rib cage and slice downward in smooth, continuous strokes, following the contour of the bone. Aim for slices about a quarter-inch thick, thin enough to be tender, thick enough to maintain structure.
For boneless turkey breast, carving becomes simpler. Position the breast with the rounded side up and slice perpendicular to the grain. The grain runs lengthwise, so cutting across it shortens the muscle fibers, making each bite more tender.
Presentation matters in French cuisine. Arrange slices slightly overlapping on a warmed platter in a gentle arc or fan pattern. Spoon a small amount of your jus over the center slices only, leaving some meat glistening but not drowning. Garnish with fresh thyme sprigs or roasted garlic cloves from your mirepoix. Serve with baguette to absorb the flavorful jus, and present the platter at the table before portioning individual plates.
Troubleshooting Common Turkey Breast Challenges with French Solutions
Even with precise French technique, challenges can arise during turkey breast preparation. Understanding how to address these issues with classical culinary principles ensures consistently excellent results.
Dry breast meat remains the most frequent problem home cooks encounter. The French solution combines multiple approaches: first, ensure your compound butter sits directly against the meat under the skin, creating a protective fat layer. If the breast appears to be cooking too quickly, tent it loosely with aluminum foil to slow browning while maintaining moisture. Most importantly, pull the turkey from the oven when the thermometer reads 160°F rather than 165°F, allowing carryover cooking to reach the safe temperature while resting. This technique, called cuisson reportée in French kitchens, prevents overcooking.
Undercooked portions typically result from improper thermometer placement. Insert your thermometer into the thickest part of the breast, avoiding bone contact which gives falsely high readings. For bone-in Butterball turkey breasts, check temperature in multiple locations to ensure even cooking throughout.
Why does my turkey breast cook unevenly?
Uneven cooking typically stems from starting with cold meat or uneven oven heat. Always bring your turkey breast to room temperature for 45 minutes before roasting, and position it in the center of the oven for consistent heat circulation.
How can I fix bland-tasting turkey breast?
Insufficient seasoning time causes bland results. Season your Butterball turkey breast at least 12 hours before cooking, or better yet, dry brine it for 24-48 hours to allow salt to penetrate deep into the meat.
What if my turkey skin is browning too fast?
Lower the oven temperature to 325°F and tent the breast loosely with foil. The foil deflects direct heat while still allowing the meat to cook through properly.
Can I salvage an overcooked turkey breast?
Slice the meat thinly against the grain and serve it with generous amounts of warm jus or compound butter. The added moisture and fat will partially compensate for dryness.
Lack of flavor often indicates rushed preparation. French technique emphasizes advance seasoning, proper salting ratios, and building layers of flavor through aromatics and quality fat. Your mirepoix base and herb butter should be prepared with fresh, aromatic ingredients rather than dried or stale components.
When you follow proper Butterball turkey breast cooking instructions enhanced with French culinary techniques, you transform a straightforward holiday protein into a centerpiece worthy of the finest bistro. The methods you’ve learned here, dry brining for moisture retention, crafting compound butter for richness, building a mirepoix foundation, and finishing with an authentic jus, aren’t complicated restaurant secrets. They’re fundamental practices that professional chefs use daily, now adapted for your home kitchen.
These techniques require nothing more than attention to detail and respect for timing. By applying the precision of French roasting methods to your Butterball turkey breast, you’ve gained control over the cooking process rather than hoping for good results. The thermometer becomes your guide, the resting period your ally, and the pan drippings your sauce foundation.
As you prepare your next holiday meal, you’ll notice how these fundamentals build on one another. The confidence you develop from properly seasoning, monitoring temperature, and carving with intention extends beyond turkey breast to other proteins and preparations. French technique isn’t about complexity, it’s about understanding why each step matters and executing it with care.
Your guests will taste the difference between merely cooked turkey and properly prepared poultry. More importantly, you’ll approach your kitchen with the assurance that comes from mastering essential methods that deliver consistent, impressive results every time.


